Ever since moving to our home in the mountains a couple years ago I have wanted to make a ski headboard for one of our bedrooms. It took me a while, and I’d do several things differently (isn’t that often the case any project you do for the first time?!), but overall I am very happy with the result.

Here’s what I did. First I collected skis. My sources were a thrift shop ($5/pair), a friend (free!!), and Craig’s List ($5 to 10/pair). For this queen sized bed I used 12 pairs. Since skis vary in width, it could have been more or less.

Next, I removed the bindings. This turned out to take a LOT of arm and hand strength–those bindings are not made to be removed! A few plates and screws resisted, and I didn’t mind the look of the leaving a few in. Since the skis are definitely used I kind of liked the detail of some stickers, some screws, etc, still remaining.
Then I cleaned the skis as thoroughly as I could. I didn’t try to remove stains, scratches, etc, simply wanted all of the dirt and debris gone.
I thought at first I’d want to leave the pairs together, as seen in my first layout.

First iteration!
My first plan was to drill two holes at the bottom of each ski and then use heavy duty screws, nuts, and bolts to fasten them to a baseboard. That was a big fail! I drilled 2 holes and they took over 30 minutes, were not completely even, and a local handyman shop said it would take them just a long, at a cost of about $400. No, thank you!
I created a layout I liked and went with my next plan.

I thought I’d stagger the heights, but didn’t really like it.

My final layout.
My next plan was to use an existing baseboard and glue the skis to the board. I used Gorilla Glue. It is amazing, BUT it expands a LOT! I knew it would expand 3X, but it seemed to me it expanded even more. As a result, some leakage occurred. I cut that part off. Next time I would put very thin squiggles over a larger area. This held great, BUT because the skis are so long, any movement tended to break the glue bond. So I decided to use another support. Again, I used a Gorilla product. I used the strongest Gorilla tape and taped around the entire base, using several strips.

Taping partly done. That Gorilla tape is great!
Next I added several layers of indoor/outdoor polyurethane. After the second coat I let the headboard dry at least 24 hours, and lightly sanded. I did 5 coats in all.
To make the whole thing more stable I added 1/4×1″ trim board in two locations near the top of the headboard. I used ACE Mounting Tape as the cost was about half the brand names, and it worked great. I spray painted the trim pieces the same color as the wall behind where the headboard would be.

Needed additional support near the top.

The ACE brand tape was cheaper and worked great.
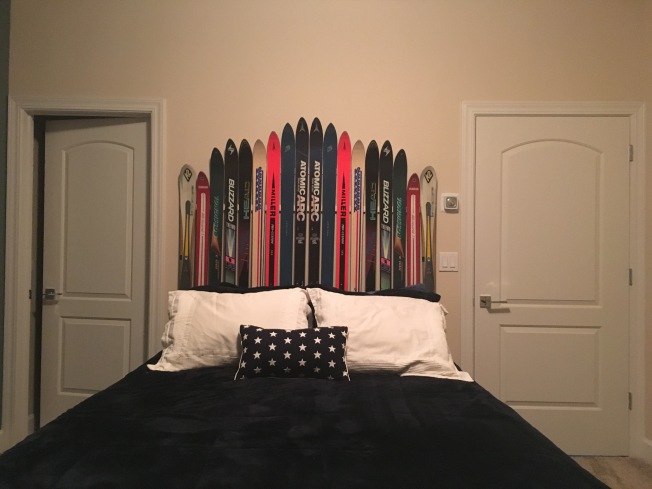 Another view, a bit closer, better to see the variations of the skis. I loved the variety of skis. One pair had been a rental pair, another had been from a ski team member, some were engraved, one pair was from a dear friend of mine.
Overall, I’m pleased. Now on to my next project. Maybe a snowboard bench?? 🙂


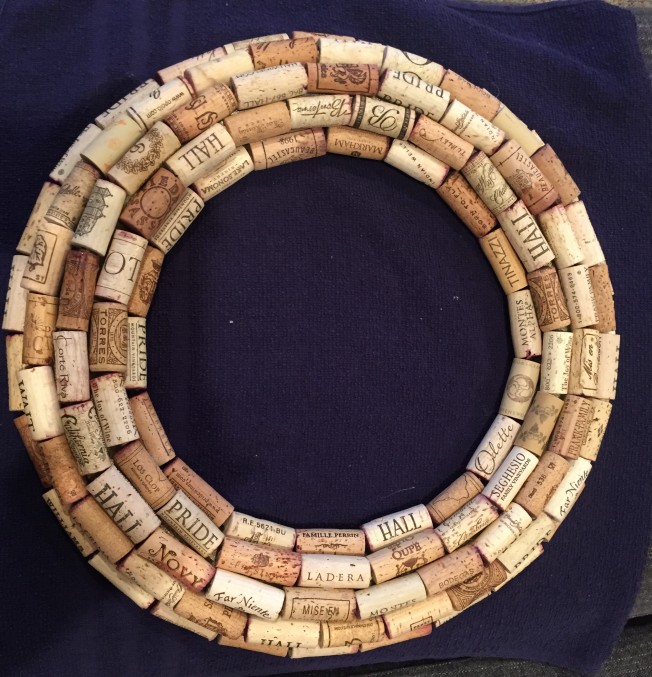 I’ve seen Christmas wreaths made out of wine corks on Pinterest and think they are very fun!


